Essential mixing plugins: the 8 types a mix needs, and what each one does
Most mixes are built from the same eight plugin types: EQ, compressor, de-esser, saturator, reverb, delay, limiter and meters. Here is what each one does, when you need it, the stock or free option to start with, and the Vitric plugin for that slot.
The essential mixing plugins are an EQ, a compressor, a de-esser, a saturator, a reverb, a delay, a limiter and meters, including a loudness meter that reads LUFS. Those eight types cover nearly every move in a mix: EQ and compression shape each track, the de-esser and the saturator refine it, reverb and delay place it in a space, and the limiter and meters handle the final level. Every full DAW includes most of them, so you can mix a finished song with what you already have.
Of all the music production plugins you can buy, these are the ones a mix cannot do without. The rest, from multiband compressors to stereo wideners, solve narrower problems, and most mixes need them less often.
The eight mixing plugins at a glance
| Plugin | What it does | Start with | Vitric plugin |
|---|---|---|---|
| EQ | Cuts and boosts frequency ranges | Your DAW's EQ | Bevel EQ |
| Compressor | Evens out level, shapes punch | Your DAW's compressor | Caliper Compressor |
| De-esser | Turns down harsh s and sh sounds | A stock de-esser or a dynamic EQ band | Chamfer De-Esser |
| Saturator | Adds harmonics and density | Your DAW's saturator or overdrive | Stoke Saturator |
| Reverb | Places a sound in a space | Your DAW's reverb, on a send | Halo Reverb |
| Delay | Echoes for depth and width | Your DAW's delay, on a send | Colonnade Delay |
| Limiter | Holds a ceiling, sets final loudness | Your DAW's limiter | Clearwall Limiter |
| Meters | Show peaks, loudness and spectrum | DAW meters and the free loudness meter | Clearwall's loudness meter |
We make the plugins in the last column. Each section below starts with what your DAW or a free tool already does, then says what the Vitric plugin adds.
1. EQ: shape the tone
An equalizer turns frequency ranges up or down. In a mix it does three jobs: it removes what a track does not need, such as rumble under a vocal or mud around 200 to 400 Hz; it makes room, so two parts stop covering each other; and it shapes tone. Most tracks get one. Your DAW's EQ is enough for that, because a clean 3 dB cut at 300 Hz does not sound better because the plugin cost more: Logic Pro's Channel EQ, Ableton Live's EQ Eight, FL Studio's Fruity Parametric EQ 2 and REAPER's ReaEQ all do it. The free EQ frequency chart shows where each instrument sits from 20 Hz to 20 kHz, and what a parametric EQ is explains frequency, gain and Q.
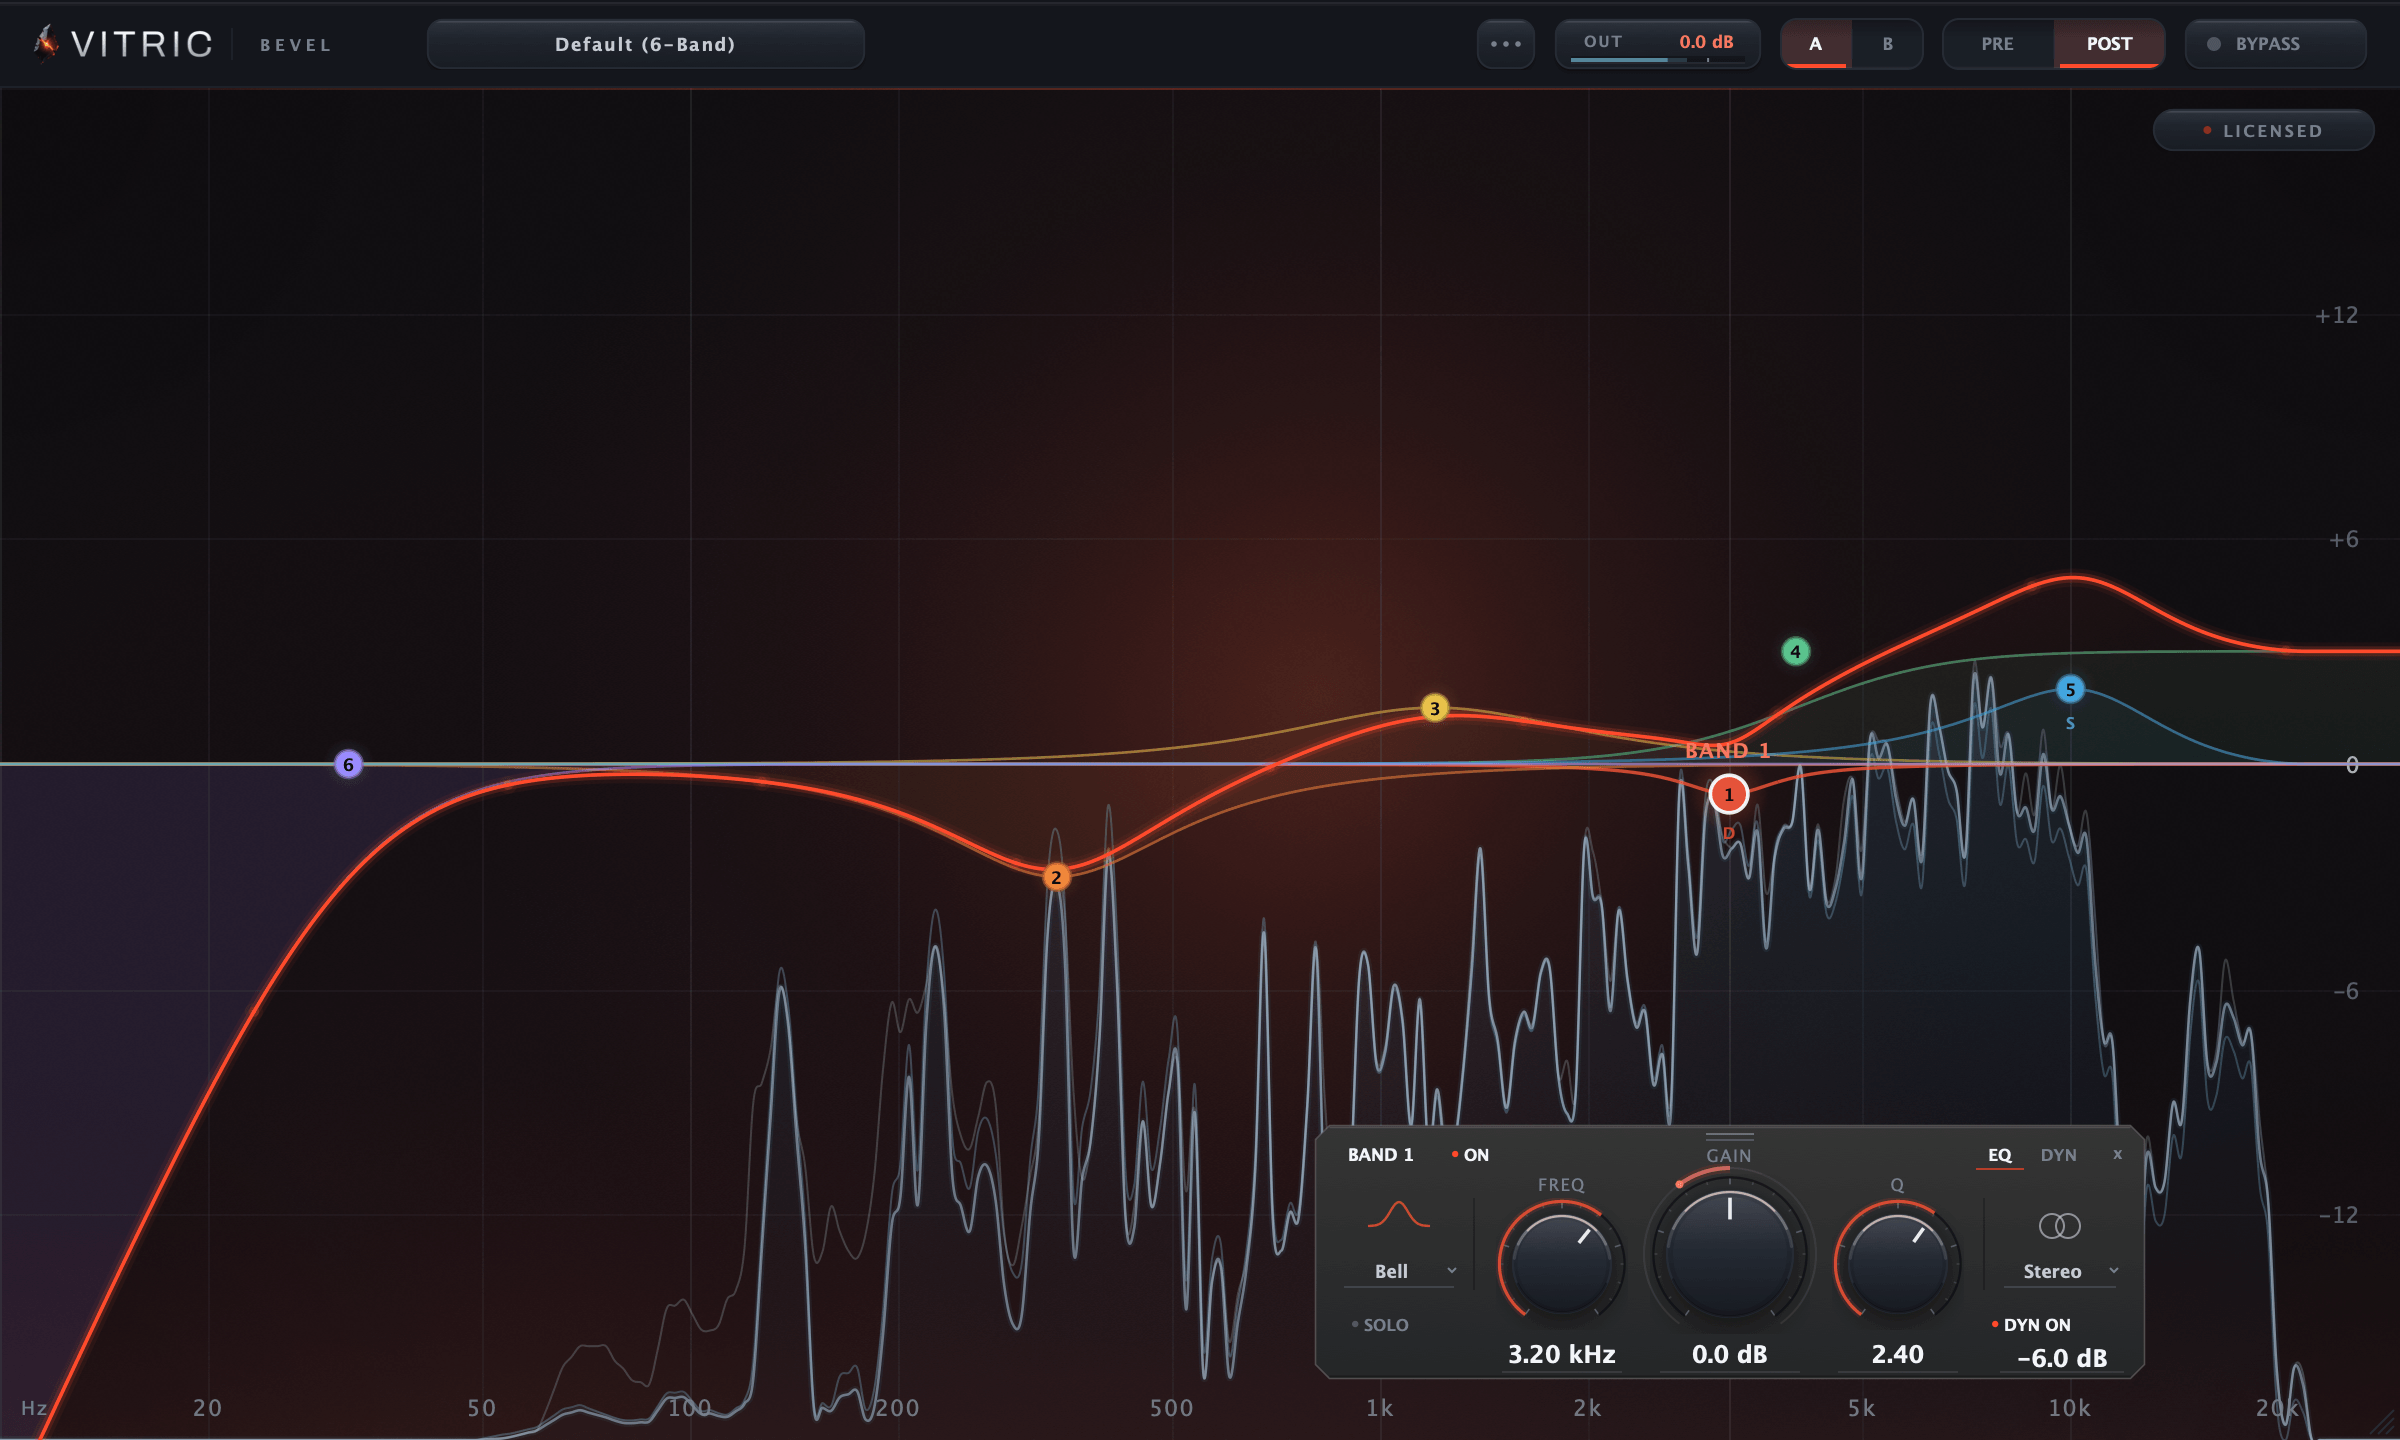
Upgrade when the problem moves: a resonance that rings only on some notes, or a cut that belongs only in the middle or the sides of a stereo track. Bevel EQ has 24 bands; any bell or shelf can be dynamic, cutting only when its range gets loud, and each band can work on the stereo signal, left, right, mid or side.
2. Compressor: control the level
A compressor turns the level down when it rises above a threshold, which narrows the gap between loud and quiet moments. On a vocal it keeps every word audible; on drums it shapes the punch; on a bus it makes the parts move together. Use one on any track whose level jumps around, vocals, bass and drums first. Every DAW includes a compressor, and the controls are the same everywhere: threshold, ratio, attack, release and makeup gain, all explained in what a compressor does.
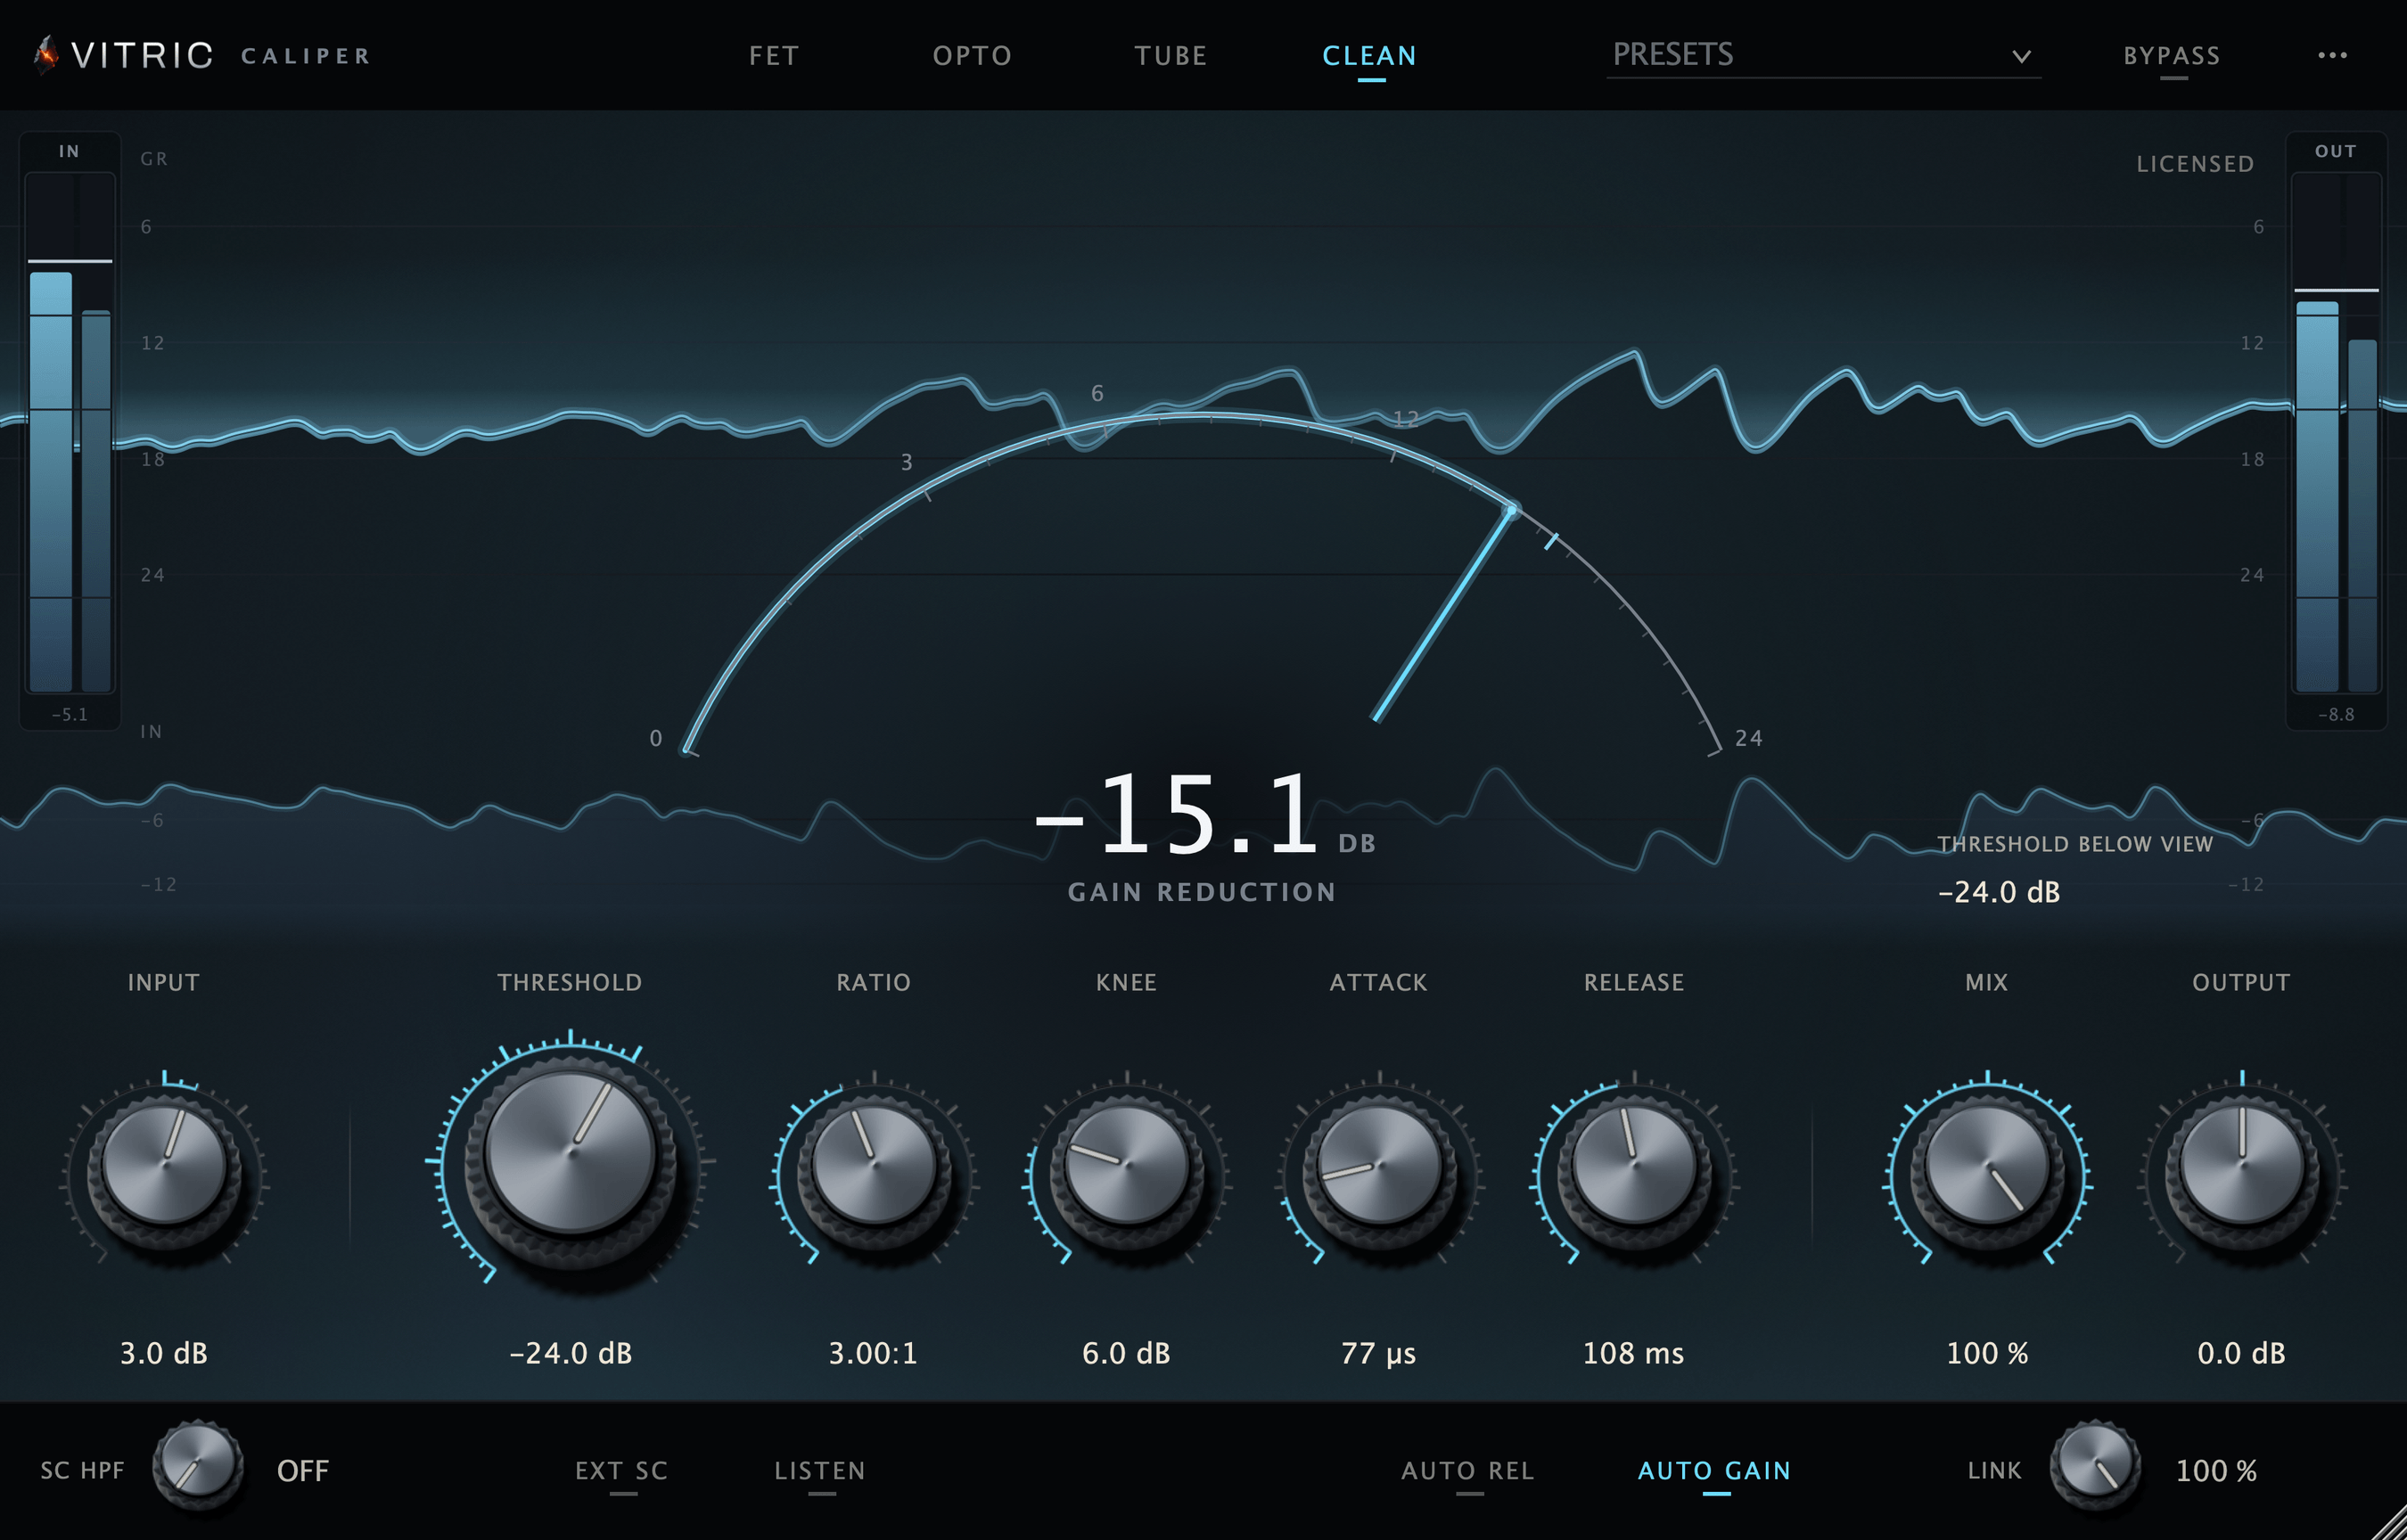
Caliper Compressor gives one window four characters: FET for fast, driven compression, Opto for smooth vocal leveling, Tube with a wide soft knee, and Clean for transparent control, plus a Mix control for parallel compression and an external sidechain input.
3. De-esser: tame harsh s sounds
A de-esser turns down s, sh and ch sounds only while they happen, so a vocal loses its sting without going dull. You need one when the esses jump out of a vocal, which is more likely with a bright microphone, close singing and heavy compression. Logic Pro has DeEsser 2 and Cubase has DeEsser. If your DAW has no de-esser, a dynamic EQ band or the top band of a multiband compressor, set on the harsh range, does the same job. See what a de-esser is.
Chamfer De-Esser can set its threshold relative to the vocal's level, so it keeps working when a quiet verse turns into a loud chorus. LEARN places the band from a phrase you play, and the Removed listen mode lets you hear exactly what it takes away.
4. Saturator: add harmonics
Saturation adds harmonics, the extra frequencies a circuit or a tape machine adds when it is driven. A little makes a part denser and easier to hear. On a bass, the added harmonics sit above the fundamental, which helps the part come through on phone and laptop speakers that cannot play its lowest notes. Push it further and it becomes audible grit. Reach for it when a part sounds thin or disappears on small speakers, not to fix a balance. Most DAWs include a saturator, an overdrive or a tape plugin; in Ableton Live it is called Saturator. What a saturator does shows the harmonics measured.
Stoke Saturator has four knobs, Drive, Tone, Mix and Output. Its Auto switch compensates the level as Drive rises, and Mix blends the saturated sound with the untouched dry track.
5. Reverb: place it in a space
Reverb is the sound of a space: the reflections that tell the ear how big a room is and how far away a sound is. More reverb pushes a part back; less keeps it in front. Put it on a send track at 100% wet, so several parts can share one space and the dry tracks stay clear. Every DAW includes one, such as Logic Pro's ChromaVerb, Ableton Live's Reverb and FL Studio's Fruity Reeverb 2. The free reverb calculator gives a pre-delay and decay that fit the song's tempo, and types of reverb explains room, hall, plate and the rest.
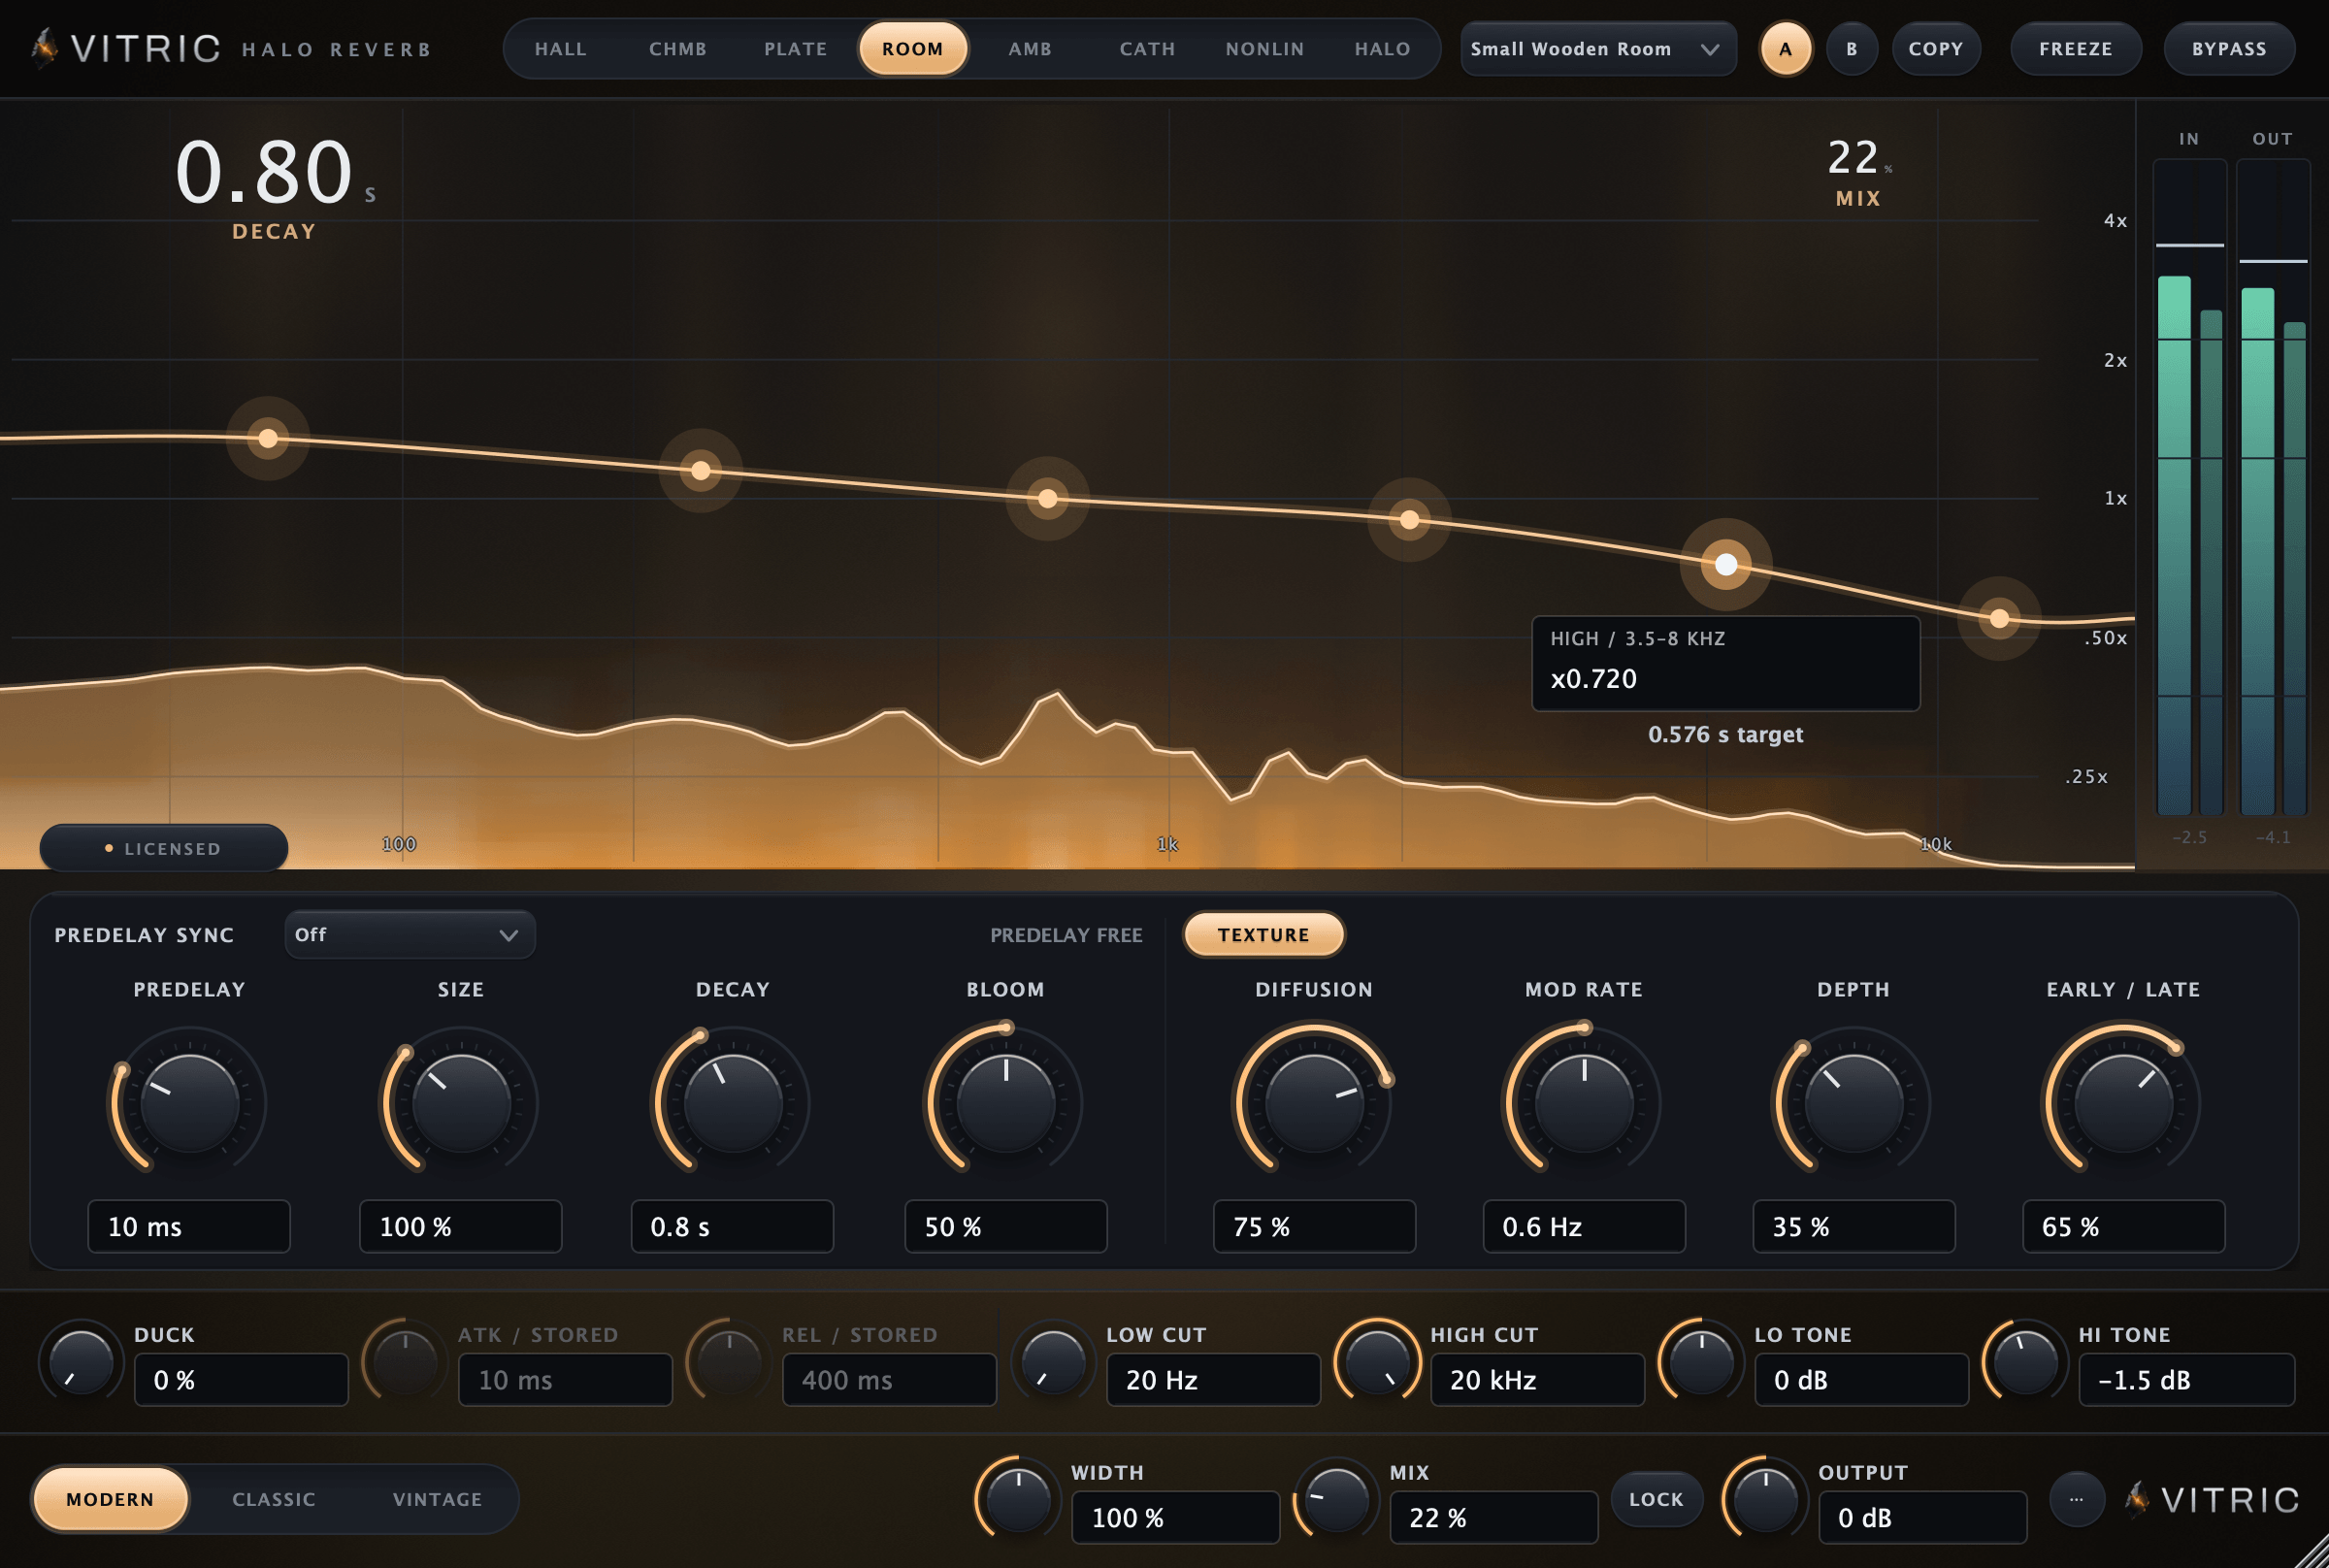
Halo Reverb has eight spaces, shapes the decay separately in six frequency bands, and ducks its tail with the dry signal so a vocal stays clear while the reverb fills the gaps.
6. Delay: echoes for depth
A delay repeats the sound after a set time. A short slapback thickens a vocal or a guitar, a ping-pong echo widens a part, and a long echo on the last word of a line, called a throw, fills the gap after it. Delay adds depth with less wash than reverb, which is why many mixes use both. Put it on a send and time it to the song. Every DAW includes one, such as Logic Pro's Tape Delay, Ableton Live's Delay and FL Studio's Fruity Delay 3. The free delay calculator turns a tempo into milliseconds for every note value, straight, dotted and triplet, and types of delay covers the styles.
Colonnade Delay runs two delay engines, each Studio, Tape, Bucket or Ghost, routed in parallel, ping-pong, serial or mid/side, so a close repeat and a distant wash can live in one plugin.
7. Limiter: hold the ceiling
A limiter is a compressor with a ratio so high that nothing passes its ceiling. It goes last on the master, where it raises the loudness and holds the peaks under that ceiling; a true-peak limiter also catches the peaks that fall between samples. While you mix a song that will be mastered afterwards, leave it off the mix bus and keep the peaks below about -3 dBFS, so mastering has room to work. If you master your own songs, it is the last plugin you add. Logic Pro's Adaptive Limiter, Ableton Live's Limiter and FL Studio's Fruity Limiter are all stock. What a limiter does covers the settings.
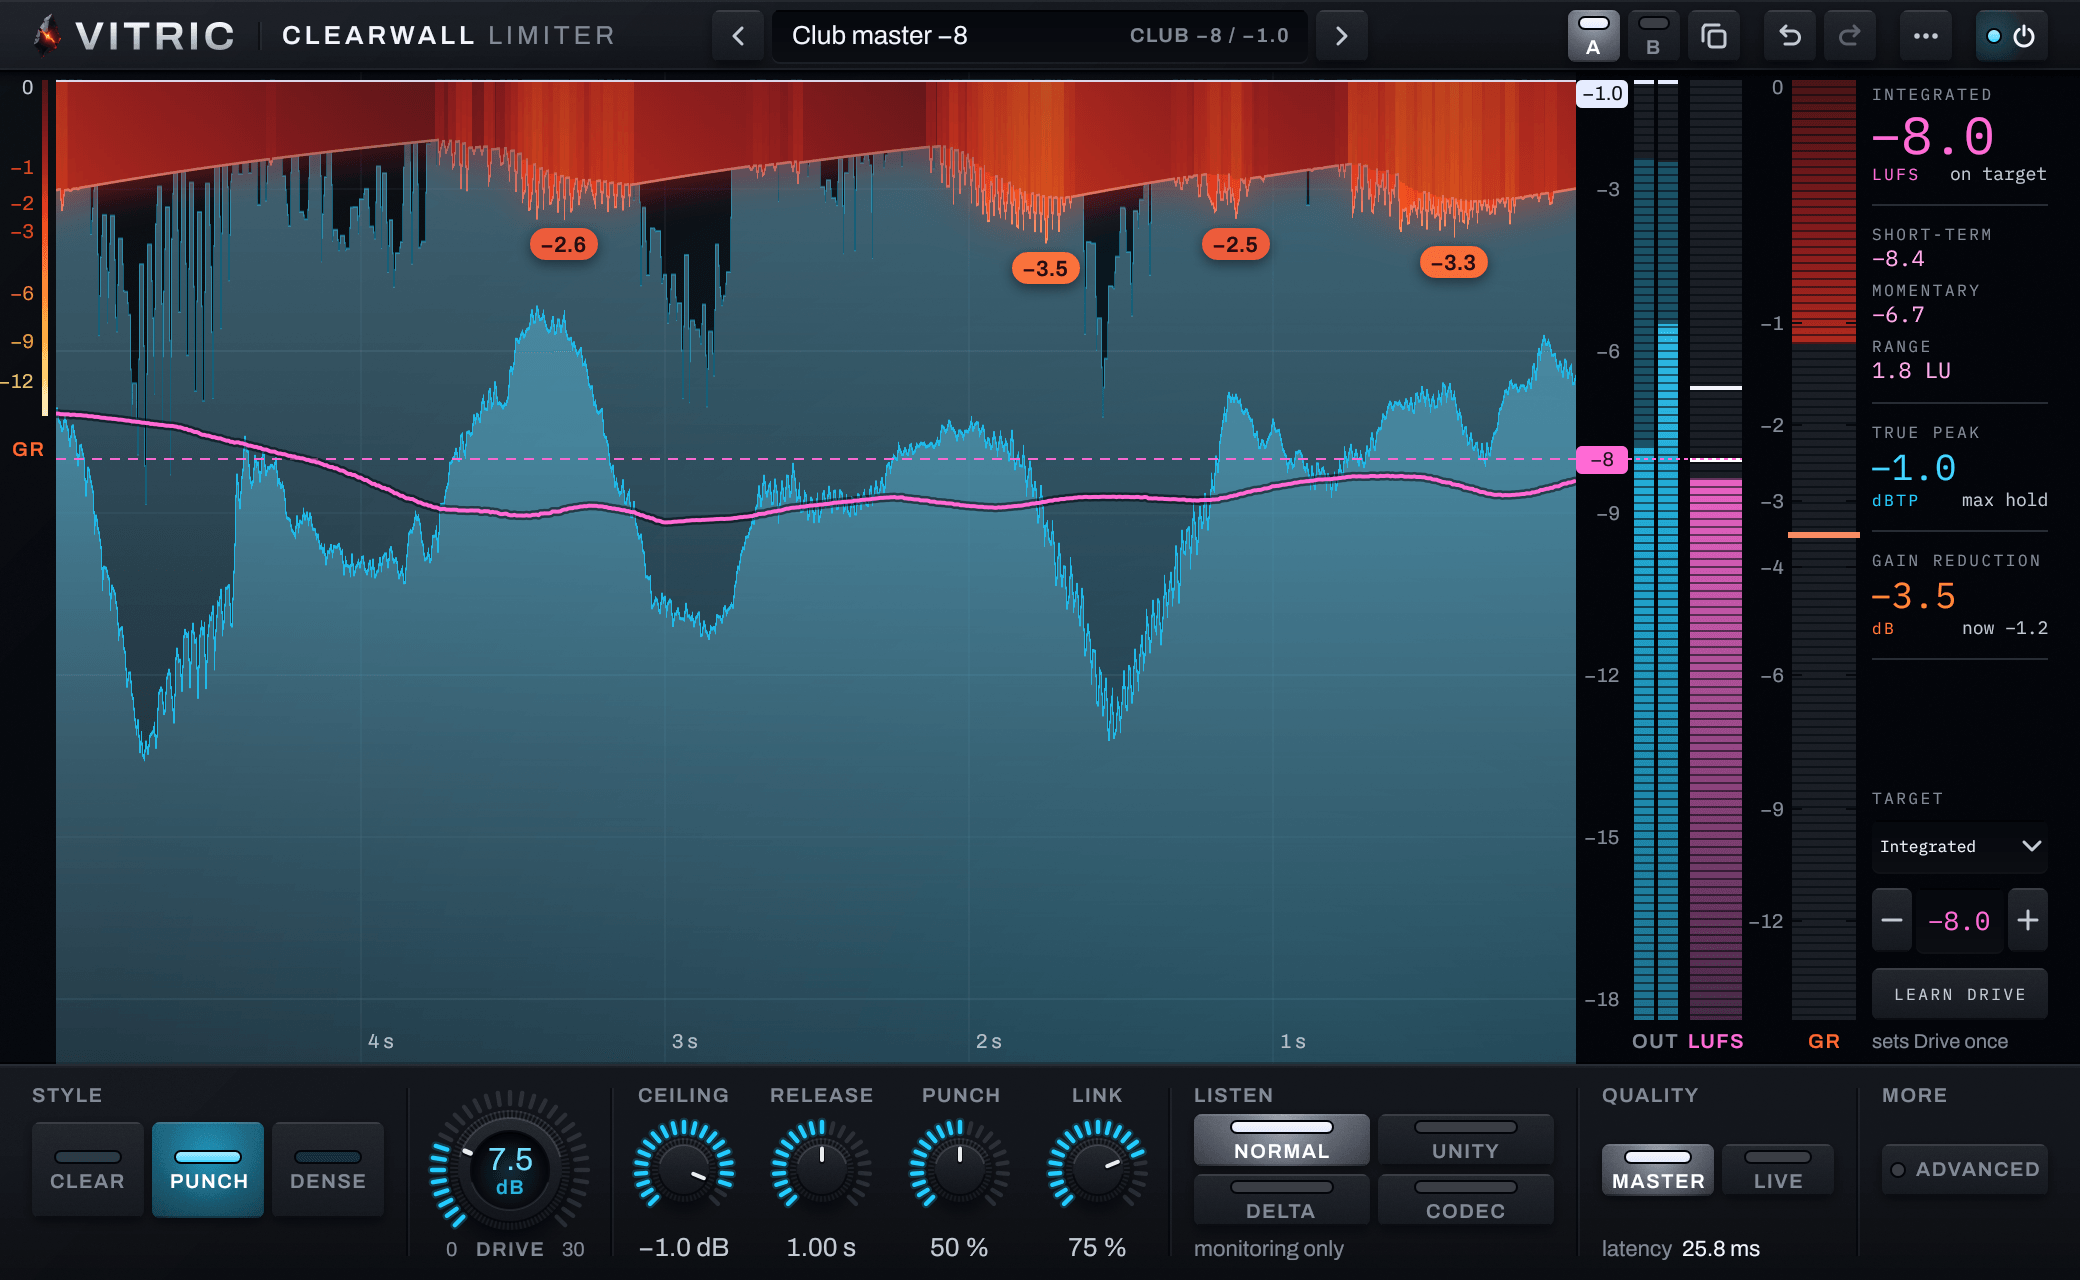
Clearwall Limiter holds a true-peak ceiling in three styles, Clear, Punch and Dense. Set a loudness target and Learn Drive sets the Drive to meet it; Unity then lets you compare the result with the input at matched loudness.
8. Meters: check what you hear
Meters confirm what your ears tell you. A peak meter shows whether anything clips. A loudness meter reads LUFS, the unit streaming services use to measure and normalize songs. A true-peak reading shows the peaks between samples, and a spectrum analyzer shows the frequency balance. Every DAW has peak meters on its channels, and some include more: Logic Pro has a Loudness Meter and a MultiMeter. The free online loudness meter reads a bounced file in your browser, with no upload, and gives integrated LUFS, short-term and momentary maximums, loudness range and true peak, with what each streaming service says it does to a track at that level. LUFS targets for streaming explains the numbers.
Clearwall also carries its own loudness meter, to ITU-R BS.1770: integrated, short-term and momentary loudness, true peak and loudness range, read on the master where you set the final level.
What about the other plugin types?
Several more types are useful, and none of them is needed on the first day:
- a noise gate, for drums and noisy recordings;
- a multiband compressor or a dynamic EQ, when one frequency range of a track needs its own control; see dynamic EQ vs multiband compression;
- pitch correction, for vocals; see how to use autotune;
- chorus, flanger and phaser, for movement and width.
Add them when a track asks for them, not because a list says so.
Stock, free or paid: when to upgrade
A plugin is worth buying when you can name the job your stock one cannot do: a resonance that rings on some notes only, a de-esser that has to follow a singer from verse to chorus, a reverb that should duck under the voice. If you cannot name it yet, the stock plugin is not what is holding the mix back; the balance usually is. Before you judge any plugin, match its output to the bypassed level, because louder reads as better on a first listen, and try it on your own tracks rather than a demo. Every Vitric plugin has a free 3-day trial with every feature, so you can hear one in your own session before you decide.
Where each plugin goes
EQ, compression, de-essing and saturation go on a track's inserts and process the track itself. Reverb and delay usually go on send tracks that several parts share. The limiter and the loudness meter go on the master. The order inside a chain matters too: on a lead vocal it runs cleanup, pitch correction, EQ cuts, compression, de-essing, saturation and tone EQ, as the vocal chain order guide explains slot by slot. For the whole process, from setting up the session to the export, see how to mix a song.
Questions
What plugins do I need to mix a song?
An EQ, a compressor, a reverb, a delay and a limiter cover most of a mix, plus a de-esser for vocals, a saturator for color and a loudness meter for the final level. Your DAW already includes most of them.
Are stock DAW plugins good enough for mixing?
Yes. A stock EQ, compressor, reverb and delay can mix a finished song. Paid plugins add speed and specific features, such as dynamic EQ bands or mid/side placement, but they do not fix a balance problem.
Which mixing plugin matters most?
The fader comes first, then EQ and compression. Most mix problems are a balance of levels and frequencies, and those three tools address most of them.
Do I need a limiter while mixing?
Not on the mix bus, if the song will be mastered afterwards. Keep the peaks below about -3 dBFS and let mastering set the loudness. If you master the song yourself, the limiter goes last on the master.
Can I check LUFS without buying a plugin?
Yes. Some DAWs include a loudness meter, such as Logic Pro's Loudness Meter, and a free online loudness meter can read integrated LUFS, loudness range and true peak from a bounced file.
Should reverb and delay go on inserts or sends?
Usually on sends. A reverb or delay set 100% wet on its own track can be shared by several parts, shaped on its own, and turned up or down without touching the dry tracks.