Stoke Saturator: the manual
Learn Stoke installation, activation, Drive, Tone, Mix, Output, Auto, input calibration, presets and exact value entry.
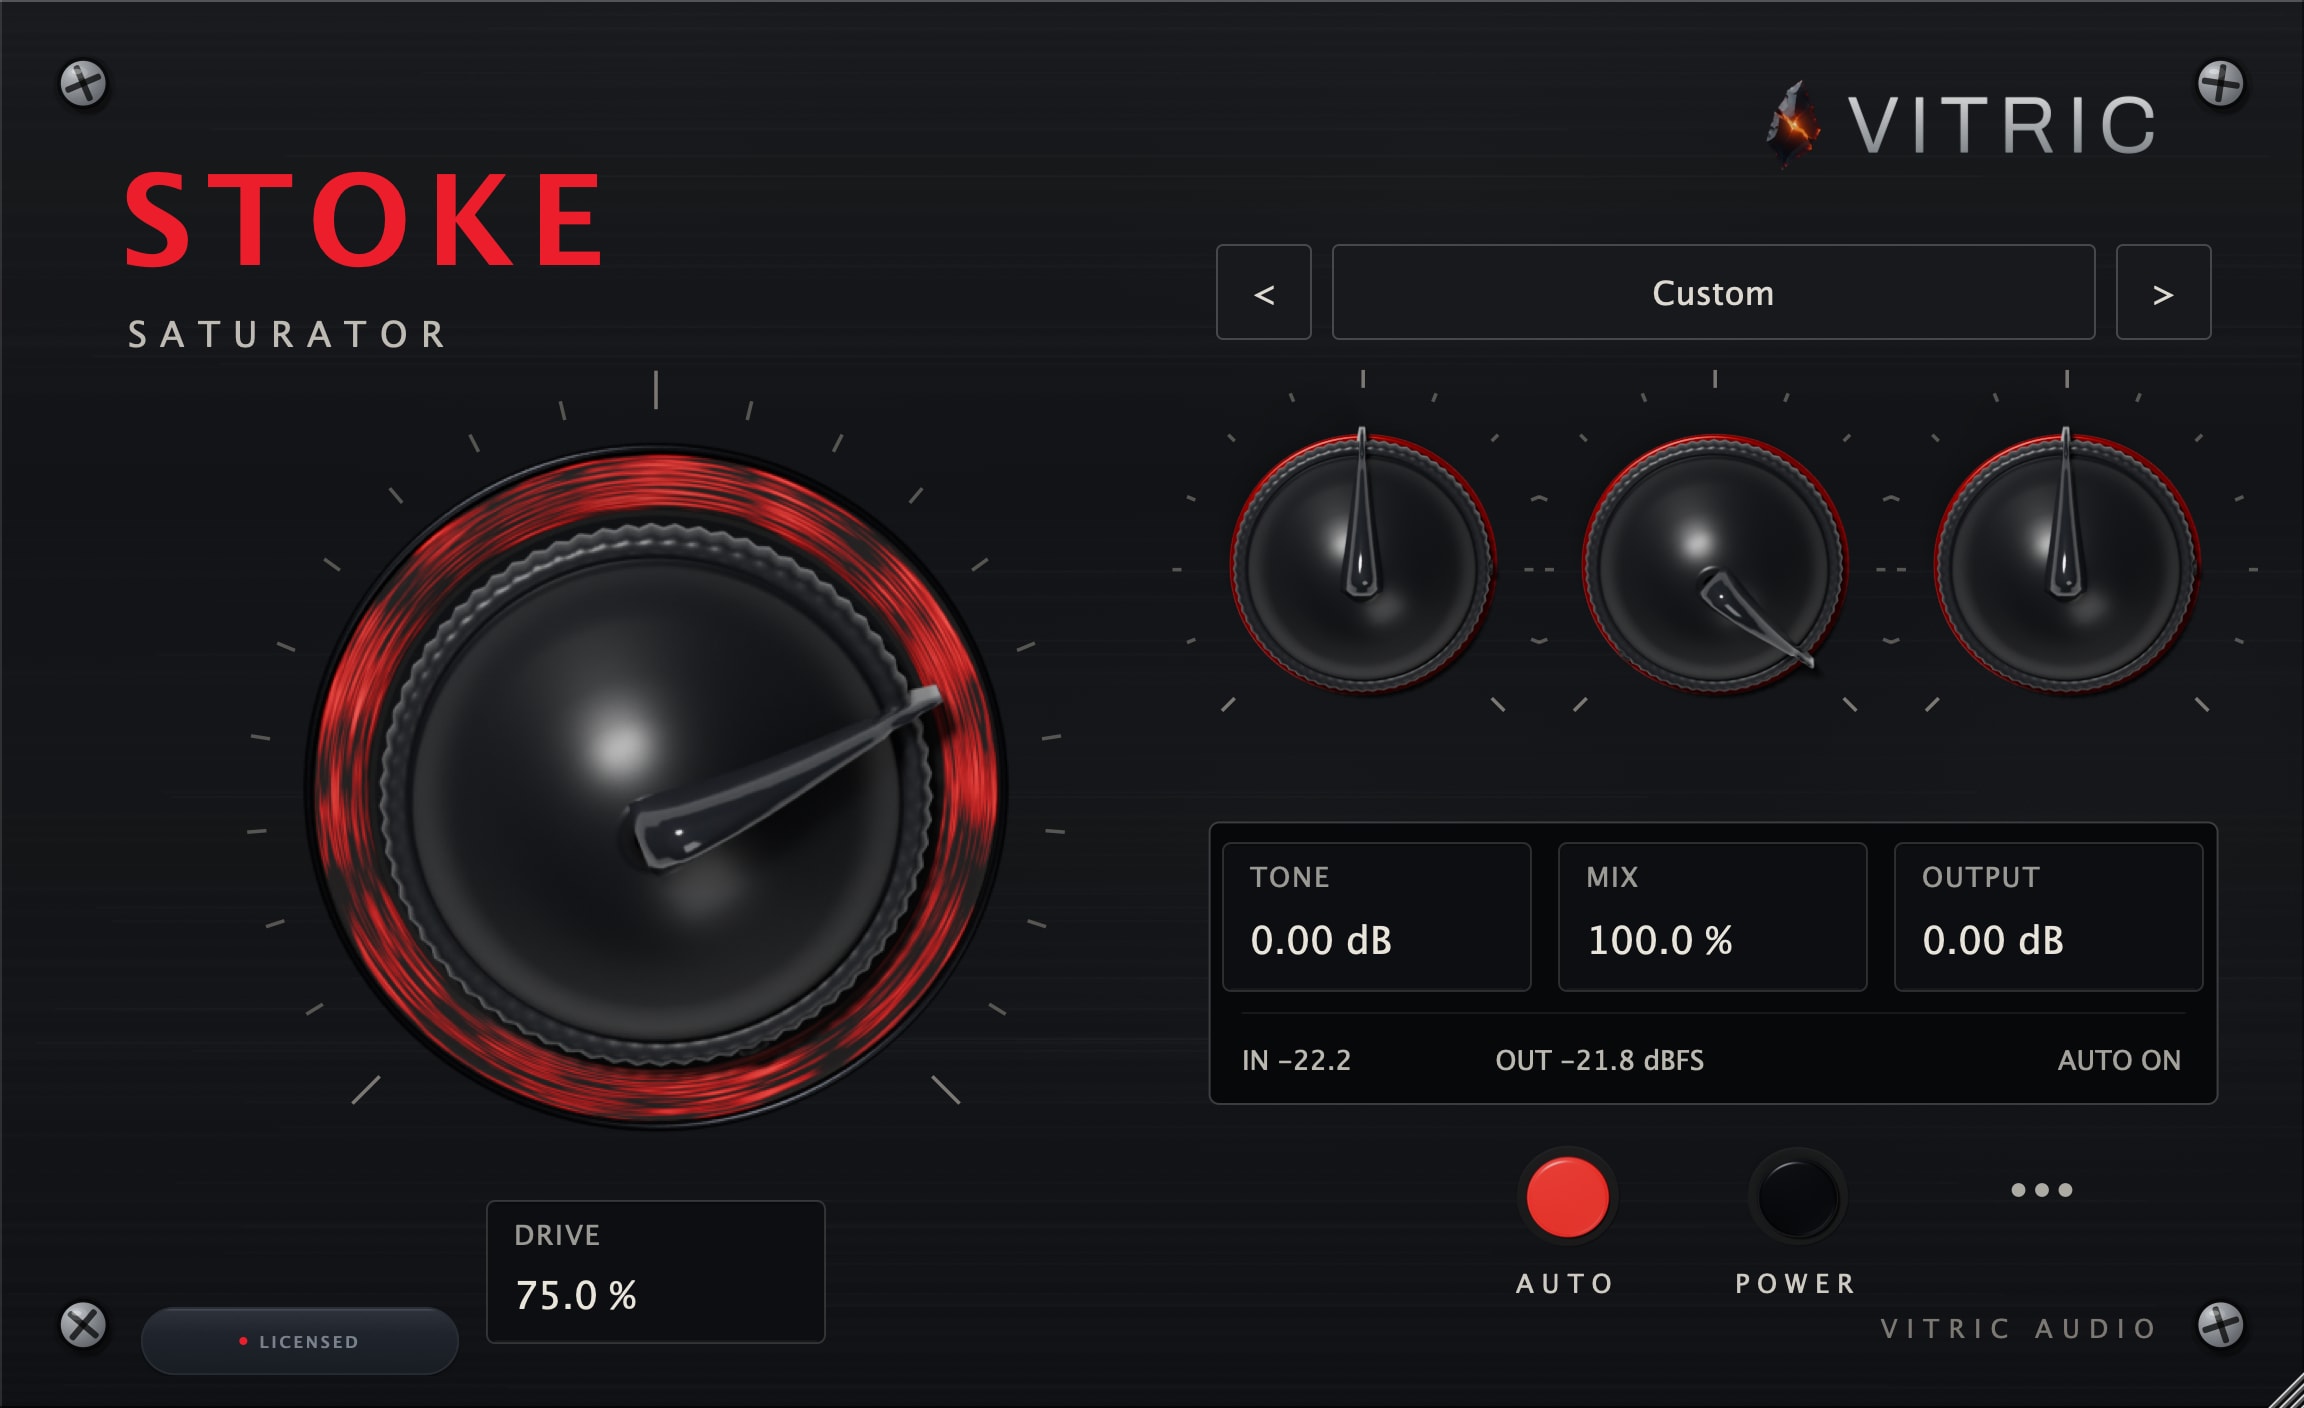
Stoke adds saturation with one continuous sound and four main controls: DRIVE, TONE, MIX and OUTPUT. AUTO compensates for the level change as DRIVE increases. POWER lets you compare the processed sound with bypass.
This guide covers the Stoke 0.2.0 interface, including exact value entry and the starting-point selector.
Installation and activation
Get the current Stoke Saturator installer for your computer. Save your session and close your DAW, run the Windows .exe or macOS .pkg, then reopen the DAW. Rescan plugins if necessary.
Insert Stoke Saturator on an audio track or bus. Use AU in Logic Pro, AAX in Pro Tools, or VST3 in a compatible host. AU is available on macOS; both platforms include VST3 and AAX.
Windows builds require Windows 10 or later, 64-bit. Mac builds require macOS 10.15 or later on Intel, or macOS 11 or later on Apple Silicon. Your DAW may require a newer operating system.
Start a three-day trial
- Open the plugin’s license panel and choose Start free trial. This opens the trial page for Stoke Saturator with your product and machine code filled in.
- Sign in using the link sent to your email. Check the product and machine code, then choose Email my trial.
- Save the attached license file from your email. On the same computer, choose Load file in the plugin’s license panel.
Install first: the three days begin when the trial license is issued. Every feature is available during that window. Keep the computer connected for periodic internet verification. There is one trial per product, person and machine, with no payment details or automatic charge. At expiry, processing locks while the plugin keeps its saved project settings.
Activate a full perpetual license
Paste the VT-... key from your purchase email or account into the license panel and choose Apply license. Full perpetual licenses work offline after activation.
For an offline studio computer, use the license portal on an online device. Enter your key and the studio computer’s VTM1-... machine code, download the bound file, transfer it to the studio computer and choose Load file. The portal can also resend your active full-license keys.
A full license allows three machine bindings over its lifetime. Deactivation does not restore a binding because permanent offline files cannot be remotely erased. Contact support for a legitimate hardware replacement after using the allowance. A trial is bound to its issuing computer.
Find the plugin after installation
Open the plugin from your DAW’s plugin browser. Check that its supported format was installed, restart the DAW, and inspect its rescan or failed-plugin list if the plugin is missing. The Mac package installs plugins, not a standalone application. Windows may also offer a standalone app under C:\Program Files\Vitric Audio.
Standard installation folders
| Format | macOS | Windows |
|---|---|---|
| AU | /Library/Audio/Plug-Ins/Components | Not available |
| VST3 | /Library/Audio/Plug-Ins/VST3 | C:\Program Files\Common Files\VST3 |
| AAX | /Library/Application Support/Avid/Audio/Plug-Ins | C:\Program Files\Common Files\Avid\Audio\Plug-Ins |
If installation or activation still fails, send support the product version, operating system, DAW version, plugin format and exact error.
Get a useful sound quickly
- Play a representative section with AUTO and POWER on. Start from Default: DRIVE 20%, TONE 0 dB, MIX 100%, OUTPUT 0 dB.
- Raise DRIVE until the added density is audible. Compare with POWER rather than judging only by increased level.
- Move TONE left for a darker result or right for more brightness.
- Lower MIX when you want a more restrained contribution without changing the DRIVE character.
- Use OUTPUT for the final level in your chain. Check the IN and OUT readings as well as your DAW meters.
Try Drum Bus Glue, Bass DI Warmth or Lead Vocal Warmth as source-specific starting points. Parallel Crush pairs full DRIVE with a lower MIX amount.
Control reference
| Control | Range and default | What it changes |
|---|---|---|
| DRIVE | 0–100%; 20% | Saturation character and amount, continuously. There are no separate saturation modes. |
| TONE | −6 to +6 dB; 0 dB | Tilt around 800 Hz on the saturated contribution. Negative is darker; positive is brighter. |
| MIX | 0–100%; 100% | Amount of the saturation contribution against the aligned dry signal. |
| OUTPUT | −12 to +12 dB; 0 dB | Final level trim. |
| AUTO | On by default | Calibrated compensation as DRIVE changes. It is a static compensation curve, not a live loudness-matching measurement. |
| POWER | On by default | Enables processing or bypasses it. |
The … menu also contains INPUT CALIBRATION → Character trim. Its visible choices are −6, −3, 0, +3 and +6 dB. This biases the drive circuit's operating point; it is separate from OUTPUT. Start at 0 dB. A positive trim makes the same DRIVE setting denser.
Stoke's input calibration settles over the first few seconds of a passage. Let it hear the source before comparing very hot or quiet material.
Read values and status
The fields under the knobs show exact values. Click a field, or focus it and press Enter, to type a percentage or dB value. Enter applies it and Escape cancels. Incorrect units and values outside the range leave the parameter unchanged.
The small console shows IN and OUT sample peaks in dBFS and the current AUTO ON, AUTO OFF or POWER OFF state. A dash indicates a settled no-signal reading. The light around DRIVE responds to the added harmonic energy; it is not a gain-reduction meter or a substitute for an output meter.
Presets and saving
The name plate and arrow buttons step through twelve starting points. You can also open Starting points in the … menu or use [ / ] while the plugin has focus.
Loading a starting point sets DRIVE, TONE, MIX and OUTPUT and turns AUTO and POWER on. It leaves Input Cal where you set it. The name follows the four sound controls and reads Custom when they no longer match a starting point. Default identifies the original insert settings. Save your own settings through the DAW session or its preset system.
The twelve names are Drum Bus Glue, 808 Weight, Kick Punch, Snare Crack, Bass DI Warmth, Lead Vocal Warmth, Backing Vocal Melt, Acoustic Body, Piano Glue, Synth Heat, Mix Bus 10 Percent and Parallel Crush. A name describes an intended use, not a literal setting: Mix Bus 10 Percent does not set MIX to 10%.
Mouse and keyboard
Drag a knob to adjust it. Shift-drag is finer; Pro Tools uses Command/Ctrl-drag. The wheel steps DRIVE and MIX by 5%, or 1% with Shift. TONE and OUTPUT step by 0.5 dB, or 0.1 dB with Shift. Arrow keys nudge the focused knob. Double-click restores the default.
With the plugin focused, A toggles AUTO, P toggles POWER, O opens options, and ? opens the shortcut sheet. Esc closes the sheet. These shortcuts are suppressed during text entry. The options menu also contains tooltips and Reduce visual effects.
Common questions
Does AUTO replace level matching by ear? No. It compensates using Stoke's calibrated curve. Material, TONE, MIX and OUTPUT still affect the result, so compare in the session.
Why can a fine value change be too small to see on the knob? The physical knob image has discrete rendered frames. Exact readouts show changes smaller than one visual frame; the parameter itself remains finer.
Why does MIX 0 still have a reported delay? The dry path is aligned with the processed contribution. Stoke reports six samples of latency to the host, equivalent to 0.125 ms at 48 kHz.
Where is the oversampling menu? Stoke has one shipping quality path and no user-facing oversampling or style selector.